 By Bobby Rahm · August 9, 2026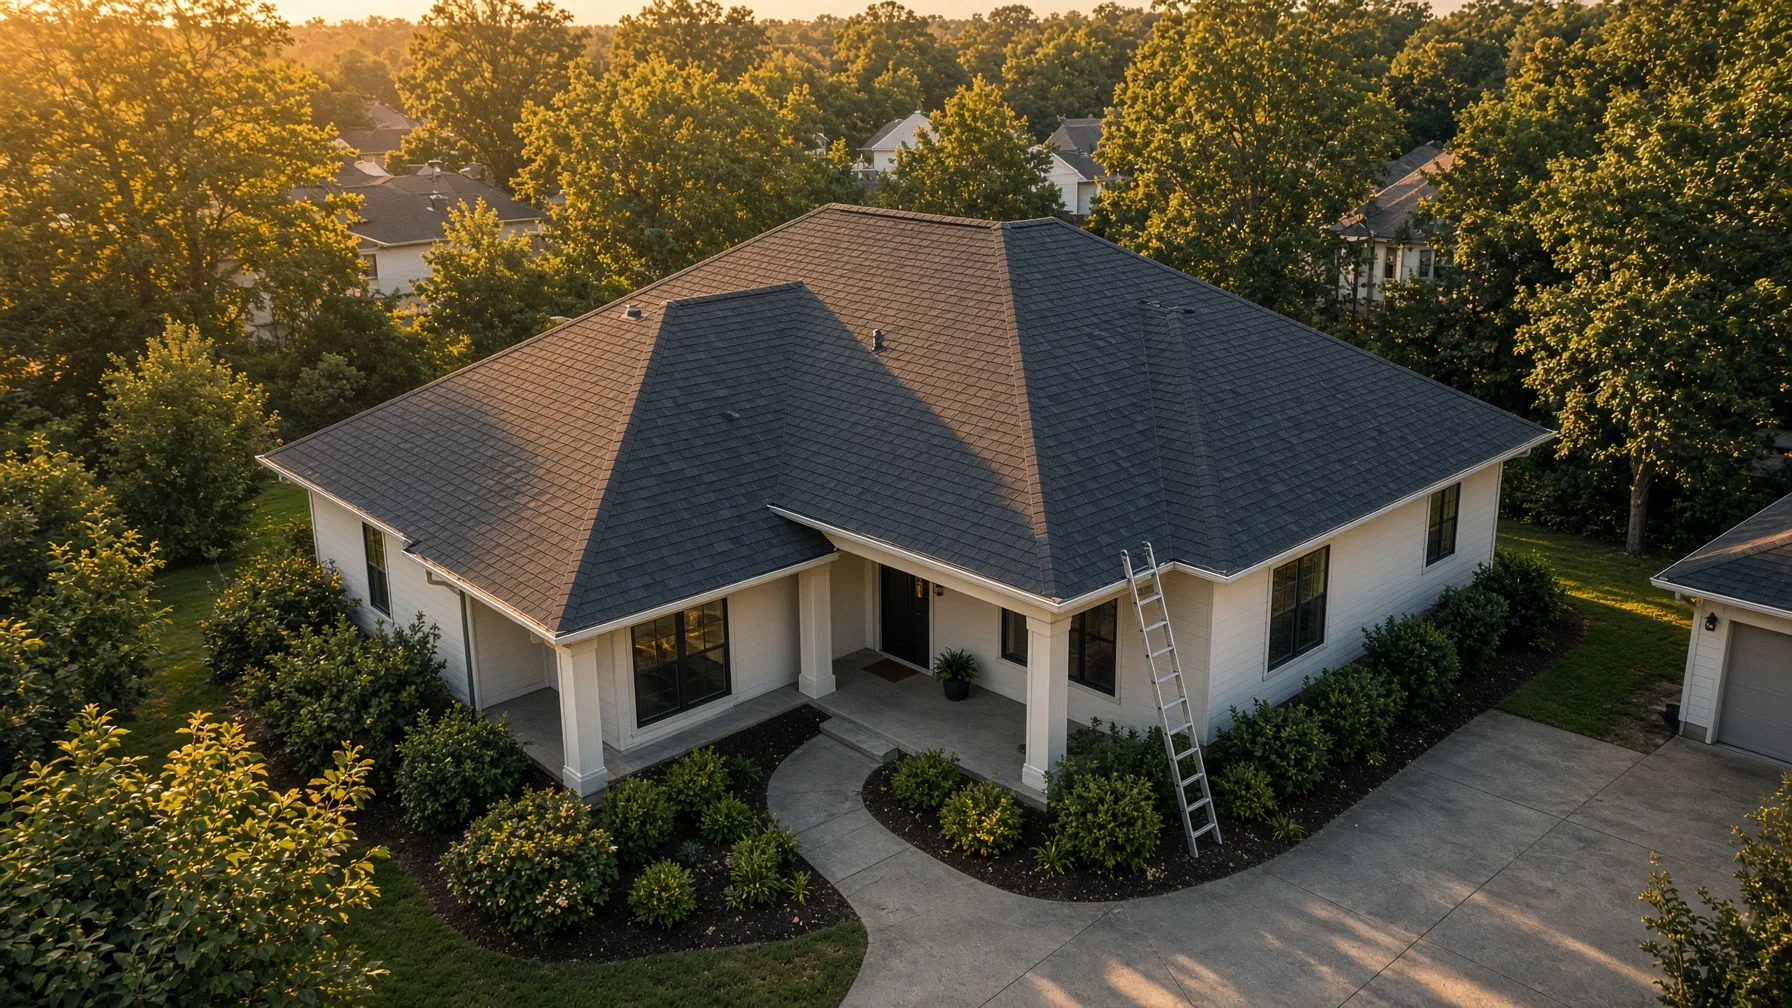
A new roof is one of the largest exterior projects many homeowners will manage. Yet the work happens in the one place that is hardest to see from the ground. A few random phone pictures may show that a crew was present, but they rarely create a clear record of what the roof looked like before work, how the project progressed, or what the completed installation looks like from consistent angles.
Drone photography can fill that visibility gap. Used correctly, it provides an organized visual record without asking a homeowner to climb a ladder or walk a roof. It can also make conversations with the contractor more specific because everyone can point to the same roof plane, valley, ridge, vent, chimney, or flashing area.
The important limitation is equally clear: photographs are documentation, not a diagnosis. A drone image cannot confirm hidden moisture, fastening patterns, deck condition beneath installed materials, code compliance, workmanship quality, or warranty eligibility by itself. Those conclusions belong to qualified roofing professionals, inspectors, manufacturers, insurers, or local authorities as applicable.
Why consistency matters more than the number of photos
The most useful roof photo set is repeatable. Before-and-after images should be captured from approximately the same direction, altitude, camera angle, and distance. When the framing changes completely, it becomes difficult to compare the old and new conditions.
Ask for a simple route that can be repeated:
- Front-left oblique view
- Front-right oblique view
- Rear-left oblique view
- Rear-right oblique view
- Near-vertical overview of the entire roof
- Closer views of major roof features
Those six basic positions usually provide more value than dozens of unorganized images. Complex roofs may need additional views for dormers, intersecting rooflines, low-slope sections, additions, or detached structures.
The before-work photo set
Schedule the first flight after the project scope is agreed upon but before materials, dumpsters, lifts, or crews block important views. The goal is to create a baseline, not to diagnose every mark visible in the shingles.
1. Whole-property orientation view
Start with one wider image showing the house, roof shape, driveway, nearby structures, large trees, and contractor access points. This helps establish where the roof sits in relation to the property and provides context for later close-ups.
2. Four corner views
Capture the roof from each corner of the house. These oblique angles show pitch, eaves, rakes, hips, ridges, valleys, chimneys, vents, skylights, and transitions better than a straight-down view alone.
3. Straight-down roof overview
A near-vertical image can show the roof as a complete system. It is useful for organizing the image set and identifying which roof plane appears in later detail shots. It should not be presented as a survey, measurement certification, or substitute for contractor measurements.
4. Existing penetrations and transitions
Request clear views of visible roof penetrations and transition points, including:
- Plumbing vents
- Exhaust vents
- Skylights
- Chimneys
- Valleys
- Sidewall and headwall intersections
- Roof-to-addition transitions
- Satellite or communications equipment
These are not proof of condition, but recording their location before work creates a useful reference.
5. Gutters, drip edges, and visible fascia
Aerial oblique images may show areas hidden from normal ground-level photographs. Include the gutter lines, eaves, and visible fascia where practical. Keep the camera far enough away to preserve context.
6. Areas already discussed with the contractor
When the contractor has identified a visible concern, ask for one wide image and one closer image of that location. The wide image shows where the area is; the close image shows detail. Avoid labeling the photo with a diagnosis unless the wording comes from the qualified professional responsible for the assessment.
Optional progress photos during replacement
Progress photography is most useful at defined milestones. Constant flying over an active crew adds distraction and may create avoidable safety problems. Coordinate timing with the contractor and keep the aircraft away from workers, equipment, loose debris, and material-delivery operations.
Useful milestones may include:
- After tear-off, when conditions are safe and the contractor approves the flight
- After visible deck repairs but before they are covered
- After underlayment or other exposed layers are installed
- After major flashing work is visible
- Near completion, before equipment leaves the site
Not every stage can or should be photographed by drone. Some details require close physical inspection, and some work is covered quickly. The roofing contractor should control access and timing around the active jobsite.
The after-work photo set
The final flight should repeat the original route as closely as practical. Capture the same four corners, the near-vertical overview, and the same feature views. This makes the record easy to compare.
Repeat the baseline views
Use the same order and filenames for the before and after sets. For example:
- 01-front-left-before.jpg / 01-front-left-after.jpg
- 02-front-right-before.jpg / 02-front-right-after.jpg
- 03-rear-left-before.jpg / 03-rear-left-after.jpg
- 04-rear-right-before.jpg / 04-rear-right-after.jpg
- 05-overview-before.jpg / 05-overview-after.jpg
Consistent naming prevents the files from becoming an unlabeled camera roll.
Document visible roof features after completion
Repeat the views of ridges, valleys, vents, skylights, chimneys, and wall transitions. The purpose is to show what is visibly present, not to certify installation quality.
Include the ground-level cleanup context
One wider aerial view can document the general condition of the driveway, yard, staging area, and material location after the job. It will not reveal every nail or small piece of debris, so a normal ground walk remains important.
Capture one clean finished-home image
After documentation is complete, take one polished image of the home with the new roof. This image can be useful for the homeowner’s records, a future listing, the contractor’s portfolio with permission, or a project summary.
What drone roof photos can and cannot do
Drone images can help:
- Create a time-stamped visual record
- Show roof geometry and visible components
- Support clearer homeowner-contractor conversations
- Compare consistent before-and-after views
- Reduce the need for a homeowner to climb for pictures
- Organize visible project milestones
Drone images cannot independently:
- Confirm that a roof is watertight
- Reveal all concealed damage or moisture
- Verify every nail, fastener, seal, or flashing detail
- Establish code compliance
- Approve warranty coverage
- Replace a qualified roof inspection
- Guarantee the outcome of an insurance claim
Owens Corning’s homeowner guidance explains that professional roof inspections may combine on-site examination with aerial cameras, satellite imagery, and sometimes infrared tools. That combination matters: aerial imagery is one input in a broader professional process, not the entire process.
Safety and legal planning for the flight
When the flight supports a paid roof project, listing, contractor portfolio, or other non-recreational purpose, the FAA generally treats it as a Part 107 operation. The remote pilot should hold the required certificate, register the aircraft as required, and follow current operating and airspace rules.
The FAA states that Part 107 pilots must keep the drone within visual line of sight, avoid careless or reckless operations, yield to other aircraft, and obtain authorization before flying in controlled airspace. Drones that are required to be registered must generally comply with Remote ID requirements unless an allowed exception applies.
For the homeowner, the practical questions are simple:
- Is the pilot operating under the correct FAA rules for the purpose of the flight?
- Has the pilot checked the airspace and any temporary restrictions?
- Has the roofing contractor approved the timing around the crew?
- Will the pilot avoid unnecessary flight over people and moving vehicles?
- Is there a clear plan for weather, obstacles, and emergency landing?
Do not ask a pilot to fly in unsafe wind, near thunderstorms, through an active material lift, or over workers simply to finish a shot list.
How to organize the final files
Create one project folder with subfolders for Before, Progress, After, and Documents. Keep the original full-resolution images and a smaller sharing set. A simple index can list the date, view direction, and brief neutral description.
Recommended structure:
Roof Replacement - 123 Main Street
- 01 Before
- 02 Progress
- 03 After
- 04 Contractor Documents
- 05 Selected Finished Images
Keep invoices, product information, permits, inspection reports, and warranty documents separate from the photo files. Photos are easier to understand when they are part of a complete project record.
A practical request to send the photographer
A homeowner can request the following:
“Please capture a repeatable before-and-after roof set with four corner views, one near-vertical overview, wider and closer views of major penetrations and transitions, and one finished-home image. Use consistent framing and neutral filenames. Coordinate any progress flight with the roofing contractor and do not represent the photos as a professional roof inspection.”
That instruction is specific enough to produce an organized record without asking the photographer to make technical conclusions outside the scope of the imagery.
Frequently asked questions
Can drone photos replace a roof inspection?
No. They can provide useful visible documentation, but a professional roof inspection may require physical examination, reports, measurements, or specialized tools that ordinary aerial photos cannot provide.
Should the drone fly while roofers are working?
Only when the pilot and contractor agree that conditions are safe. It is usually better to capture defined milestones than to fly continuously over an active crew.
Can aerial photos prove that the roof was installed correctly?
Not by themselves. They may show visible features, but they cannot verify every concealed layer, fastening detail, code requirement, or manufacturer installation requirement.
Are before-and-after roof photos useful when selling a home?
They can help organize the homeowner’s project records and show that work occurred. Buyers and agents should still rely on invoices, permits where applicable, warranties, disclosures, and inspections rather than treating photos as certification.
Who owns the drone photos?
Ownership and permitted use depend on the agreement with the photographer. Confirm in writing whether the homeowner, contractor, Realtor, or another party may store, publish, edit, or transfer the images.
Source notes
- Federal Aviation Administration, Small Unmanned Aircraft Systems Regulations (Part 107): https://www.faa.gov/newsroom/small-unmanned-aircraft-systems-uas-regulations-part-107
- Federal Aviation Administration, Certificated Remote Pilots including Commercial Operators: https://www.faa.gov/uas/commercial_operators
- Federal Aviation Administration, How to Register Your Drone: https://www.faa.gov/uas/getting_started/register_drone
- Federal Aviation Administration, Remote Identification of Drones: https://www.faa.gov/uas/getting_started/remote_id
- Owens Corning Roofing, What to Expect During a Roof Inspection: https://www.owenscorning.com/en-us/roofing/blog/roof-inspection
- Owens Corning Roofing, Roofing Estimates and Roofing Quotes: https://www.owenscorning.com/en-us/roofing/blog/roof-estimates-and-quotes
- Owens Corning Roofing, Cleaning Roof Shingles and Maintenance Tips: https://www.owenscorning.com/en-us/roofing/blog/cleaning-asphalt-roof-shingles
- FEMA training material, Proper Photographs and Damage Documentation: https://emilms.fema.gov/IS1104/groups/32.html