 By Bobby Rahm · August 9, 2026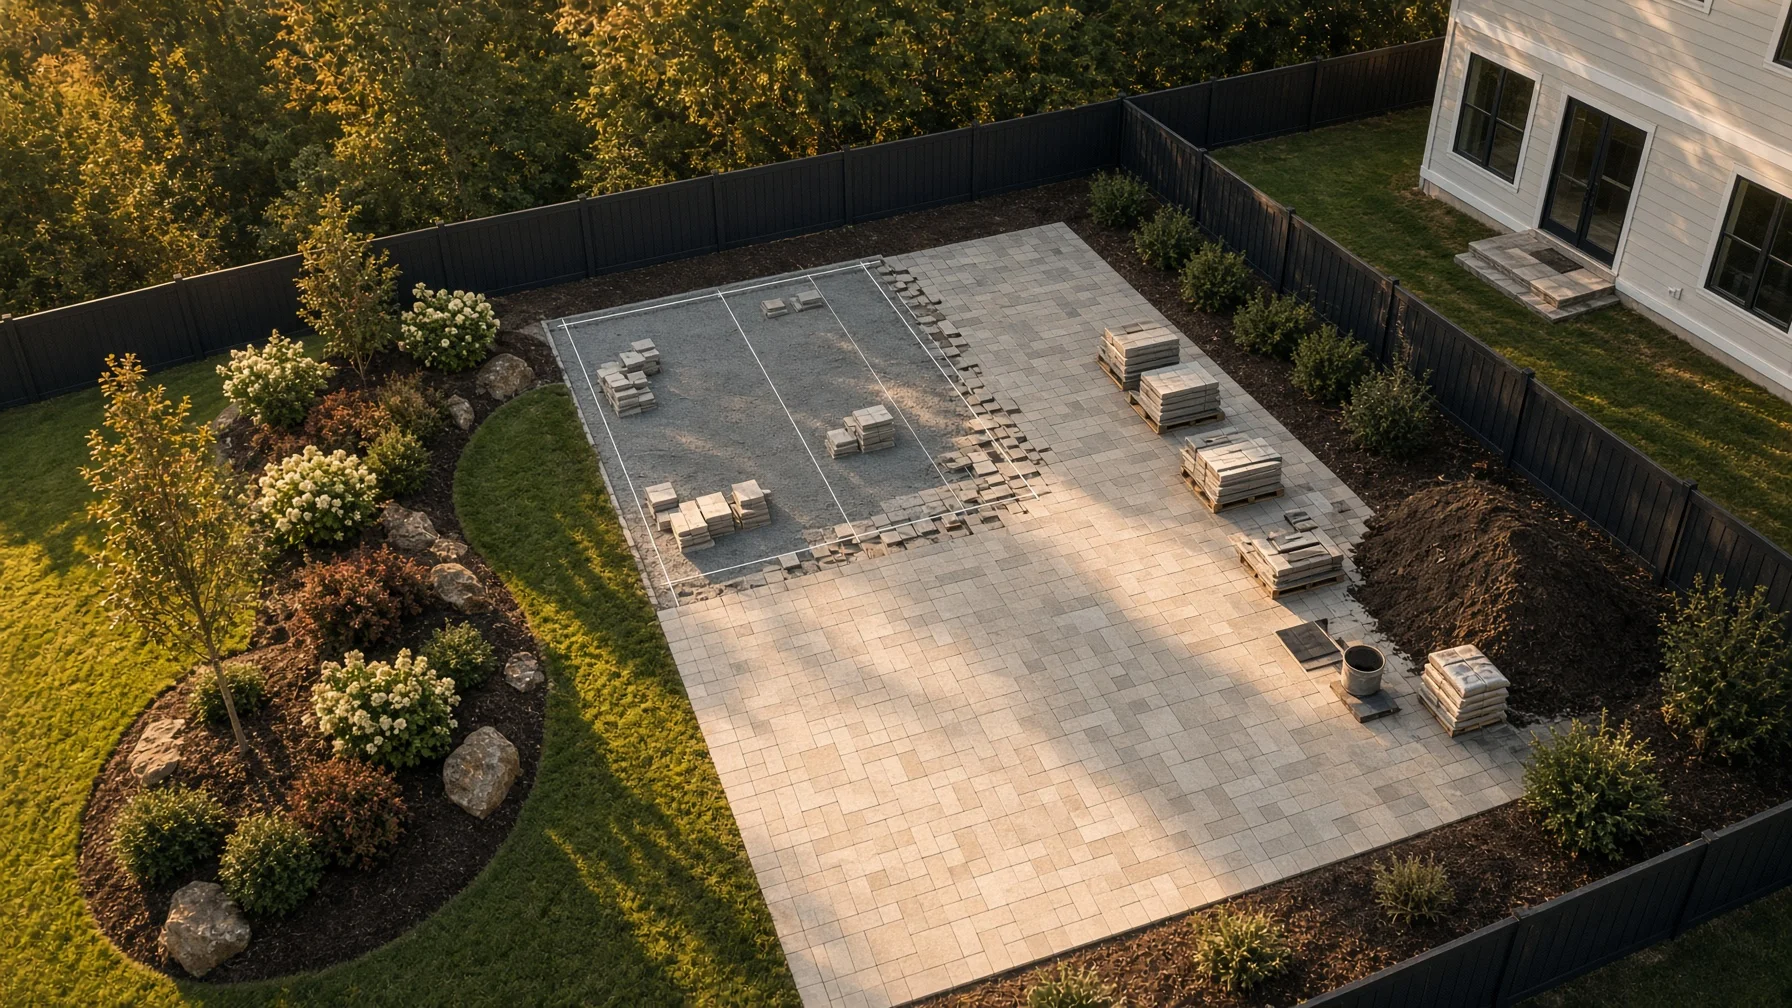
Backyard projects are difficult to understand from ground level alone. A new patio may look simple from the kitchen door, while the aerial view shows how it connects to the house, driveway, fence, drainage path, pool, trees, and neighboring property. That wider context is what makes drone photography useful during a residential outdoor renovation.
The goal is not to collect hundreds of dramatic images. The goal is to create a consistent visual record. When the same angles are repeated before work begins, during major milestones, and after completion, homeowners and contractors can compare progress without guessing which photo came from which direction.
What Drone Photos Can Document
Aerial photos are especially useful when a project changes several parts of a yard at once. Common examples include:
- patios, walkways, retaining walls, and outdoor kitchens;
- pools, spas, decks, pergolas, and pavilions;
- grading, drainage improvements, swales, and erosion-control work;
- fence replacement or property-access changes;
- tree removal, planting beds, sod, irrigation, and landscape redesign;
- additions that affect the relationship between the house and yard.
Drone photos should be treated as visual documentation, not as a substitute for a boundary survey, engineering inspection, drainage study, or code review. An aerial image can show visible conditions and relationships. It does not prove a legal property line or confirm that hidden work meets technical requirements.
Start With a Repeatable Flight Plan
The most useful renovation record comes from repeating the same views. Before the first flight, choose a small set of positions that can be used throughout the project.
A practical plan usually includes:
- one straight-down overview;
- four diagonal views from the corners of the property;
- one view from the rear property line toward the house;
- one view from the house toward the work area;
- two or three closer views of the main construction zone.
Keep the camera direction, approximate altitude, lens setting, and time of day as consistent as conditions allow. Exact duplication is not always possible because cranes, trees, temporary fencing, workers, or weather may change the safe flight path. Consistency matters more than perfection.
Before Construction: Build the Baseline
The first photo set is the reference point for everything that follows. It should show the entire area before equipment, materials, or demolition change the site.
Capture the whole yard
Take a high overview that includes the house, work area, property access, major trees, fence lines, neighboring structures, and visible drainage features. This becomes the fastest way to understand the original layout later.
Record access routes
Photograph gates, driveway edges, side-yard access, utility areas, and any path equipment may use. These images can help document pre-project surface conditions such as lawn, pavers, gravel, curbs, or narrow passages.
Photograph visible drainage patterns
Include downspouts, low areas, swales, slopes, retaining walls, and places where water visibly collects. Do not claim that a single flight establishes how the site drains in every weather condition. It simply records what is visible at that time.
Document nearby features
Capture fences, sheds, playsets, HVAC equipment, mature landscaping, exterior walls, and roof edges close to the work zone. This gives the project team context when reviewing later changes.
During Construction: Photograph Meaningful Milestones
Daily flights are rarely necessary for a typical backyard project. Milestone flights are usually more useful because they show major changes rather than minor day-to-day activity.
After demolition and clearing
This set should show what was removed and how the work area was opened. Include debris staging and access paths only when they are useful to the project record.
After grading or excavation
Photograph the shape and extent of excavation, visible slope changes, trench locations, pool or footing excavation, and access conditions. These images are valuable for orientation, but they should not be presented as measurements unless the project separately uses survey-grade equipment and qualified personnel.
Before important work is covered
When practical and safe, photograph visible drainage components, conduit routes, base preparation, reinforcement, or other work before concrete, soil, decking, or landscaping covers it. Coordinate timing with the contractor so the flight does not interrupt active work.
After hardscape installation
Repeat the overview and corner views once patios, paths, walls, decks, or pool surrounds are in place. This stage often reveals how circulation and usable space have changed.
After major landscaping
Document new beds, trees, sod, irrigation zones visible from above, and transitions between hardscape and planted areas. Fresh landscaping may look sparse at first, so label the date rather than implying the installation represents mature growth.
After Completion: Create the Final Record
The final photo set should closely match the baseline views. This makes before-and-after comparisons clear and credible.
Include:
- the straight-down overview;
- the four diagonal property views;
- the rear-to-house and house-to-yard views;
- close views of major finished features;
- one wider image that shows how the project fits the home and surrounding lot.
Remove temporary clutter when possible, but do not misrepresent permanent conditions. A useful final record should show the actual finished project, including visible utility covers, drainage features, fences, and access areas.
A Simple File-Naming System
Good file organization is almost as important as the photography. Use names that sort naturally by date and stage.
Example:
2026-08-04_before_northwest-overview.jpg
2026-08-18_grading_northwest-overview.jpg
2026-09-06_hardscape_northwest-overview.jpg
2026-10-02_final_northwest-overview.jpg
Use the same angle name every time. Store a short flight note with the approximate altitude, weather, and anything that prevented a normal shot. This makes the archive understandable months or years later.
Safety, Privacy, and Flight Rules
A paid or business-related residential photo assignment generally falls under the FAA’s Part 107 framework rather than the limited exception for purely recreational flying. The remote pilot should confirm airspace, authorization requirements, aircraft registration, Remote ID compliance, weather, people on the ground, and visual-line-of-sight conditions before flight.
The FAA states that Part 107 pilots must avoid manned aircraft, operate carefully, and keep the drone within visual sight. Controlled airspace may require authorization. Operations over people or moving vehicles are subject to specific requirements, so a renovation site should be planned to avoid unnecessary overflight of workers, neighbors, streets, and occupied areas.
Property permission and airspace authorization are different issues. Permission from the homeowner does not replace FAA requirements, and FAA authorization does not automatically grant permission to launch from any property. A professional operator should address both.
Privacy also matters. Frame the project property rather than collecting unnecessary detail from neighboring yards, windows, or private activity. When a useful angle would intrude on a neighbor, choose a different position or crop.
How Many Flights Does a Project Need?
A small patio or landscaping update may need only three sessions: before, one major milestone, and final. A pool, retaining-wall, drainage, or full outdoor-living project may benefit from five to eight milestone sessions.
The right number depends on what will become hidden, how long the job lasts, and how the photos will be used. More flights do not automatically create a better record. A short, consistent set at the right stages is more valuable than a large collection of unrelated views.
Final Checklist
Before each scheduled flight, confirm:
- the milestone is actually ready to document;
- the work area can be photographed without disrupting crews;
- the planned angles can be flown safely and legally;
- temporary conditions are noted;
- the same core views from the previous session will be repeated;
- files will be labeled and delivered by date, stage, and angle.
A backyard renovation can take weeks or months, but the final transformation may be difficult to appreciate from memory. A disciplined drone-photo plan creates a clear visual story: what existed, what changed, and how the finished space fits the home.
Frequently Asked Questions
Can drone photos verify my property lines?
No. Aerial photos may show fences, landscaping, and visible occupation lines, but they do not replace a licensed boundary survey or legal property records.
How often should progress photos be taken?
Schedule flights around major milestones rather than arbitrary intervals. Before work, after demolition, after grading, before important work is covered, after hardscape, and after final landscaping are common points.
Can the drone fly while contractors are working below?
The pilot must evaluate people, vehicles, equipment, airspace, and site conditions. It is often simpler and safer to schedule brief flights when the immediate area is clear.
Are backyard-renovation drone photos only useful for contractors?
No. Homeowners can use them for personal records, before-and-after comparisons, project communication, maintenance references, and future resale materials, subject to accuracy and disclosure needs.
What is the most important photo to repeat?
The straight-down overview is useful, but the best record combines it with the same four diagonal views. Diagonal images show depth, height, and the relationship between the house and yard more clearly.
SOURCE NOTES
- FAA, Small Unmanned Aircraft Systems Regulations (Part 107): https://www.faa.gov/newsroom/small-unmanned-aircraft-systems-uas-regulations-part-107
- FAA, How to Register Your Drone: https://www.faa.gov/uas/getting_started/register_drone
- FAA, Remote Identification of Drones: https://www.faa.gov/uas/getting_started/remote_id
- FAA, Recreational Flyers and Community-Based Organizations: https://www.faa.gov/uas/recreational_flyers
- FAA Aeronautical Information Publication, UAS access and airspace authorization overview: https://www.faa.gov/air_traffic/publications/atpubs/aip_html/part2_enr_section_8.1.html